{Crafting} Carving my own stamps
 At the end of March I went to the Oregon coast for an awesome retreat. This is the fourth time in as many years I've been to this retreat and each year I return home with new friends, a full heart and lots of new skills. This year, one of the mentors was Elise Blaha Cripe, maker and business woman extraordinaire.
![]()
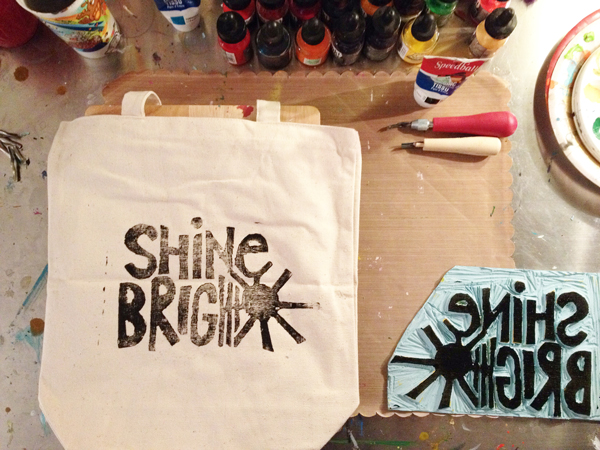
When I was taking Elise's class I had no idea how much I'd enjoy carving stamps. It's highly addictive. I want to create all sorts of stamps and stamp everything in my house – pillows, bags, tea towels, etc.
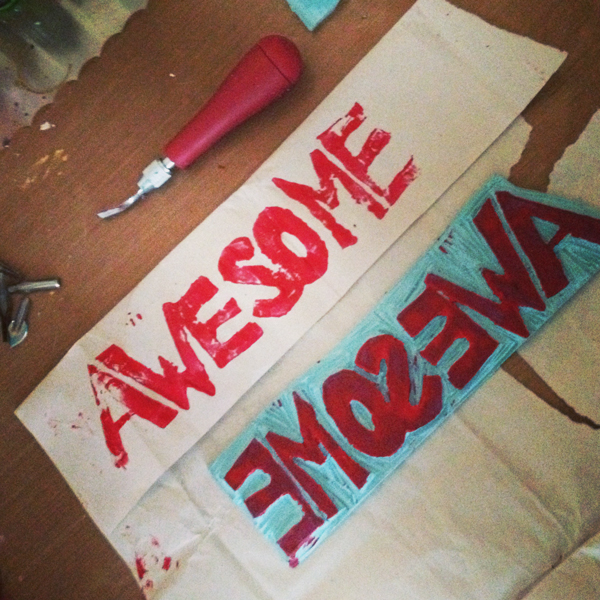
The best part is getting started only takes a few supplies. The main tool you'll need is the one for carving the stamps, a Speedball Linoleum Cutter. Then, you'll need something to carve into. I've been using the Speedball Speedy-Carve Carving Blocks in all sorts of sizes. Once you've carved your stamp, then you'll need some sort of ink or paint (I've been using this fabric paint), as well as a brayer to spread the ink/paint onto your stamp. I bought a bunch of simple canvas bags and I've been using those as my practice canvases.
Essentially, you need to come up with a design, sketch it out, transfer it to your block and then carve away. I've been sketching my little heart out. I have a zillion ideas of different stamps I'd like to make.
I'm not expert when it comes to stamp carving, but I'm enjoying exploring all the possibilities. There is a cool online stamp-carving class that I might take. There are also some fun tutorials here, here and here.